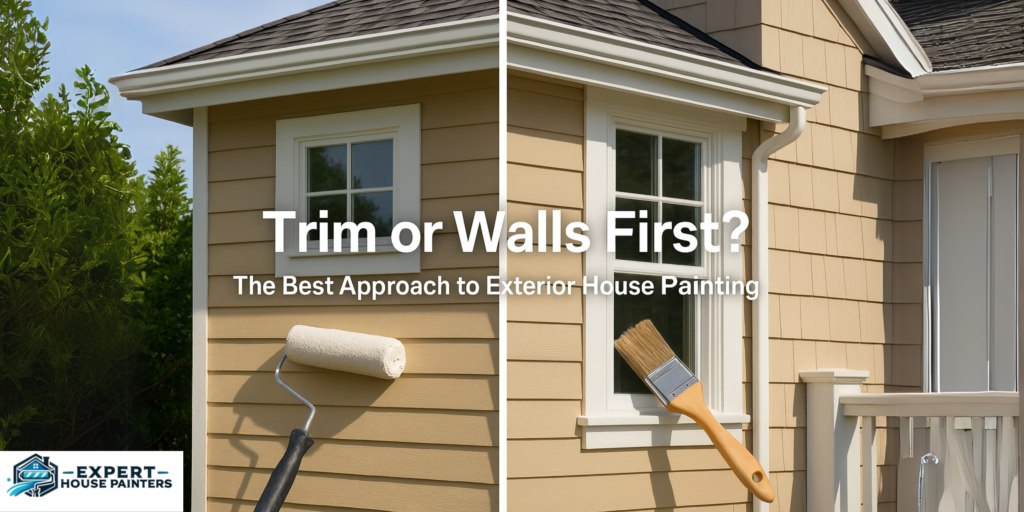
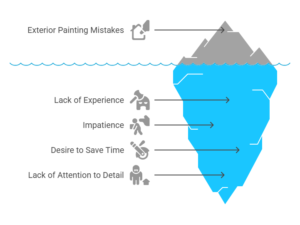
Exterior House Painting – Re-painting the outside of your house can make your property look much better and increase the value of your property. However, homeowners often find themselves in a similar predicament when it comes to the paint job: Is painting the walls or the trim your first step in the home painting process?
This decision might seem minor, but it can impact everything from your timeline to the final finish. Let’s break down the answer and look at all the things you need to consider before picking up that paintbrush.
What Is Considered Trim vs Walls?
It is important to know the location of trim and wall sections before you start your exterior House painting work. This makes it convenient to treat each surface with the appropriate technique.
In construction language, trim is the section of the house that surrounds and beautifies it. This includes:
- Window and door frames
- Fascia boards
- Eaves and soffits
- Corner boards
- Railings and decorative molding
To add visual interest, trim pieces are usually painted in colors that contrast with or harmonize well with the home’s dominant facade. They are usually narrow, have elaborate designs, and require a balanced hand to obtain sharp edges.
On the other hand, walls generally refer to the larger, flat surfaces of your home’s exterior. Depending on the type of home you have, these could be:
- Wood or vinyl siding
- Brick or stone facades
- Stucco walls
- Cement fiberboard
The walls typically get the primary color and cover the largest surface area, so this part of the job takes up the most time and materials.

Should You Paint Trim or Walls First?
This is the million-dollar question for many DIYers and even professional painters. While both approaches can work, it’s important to weigh the pros and cons of each.
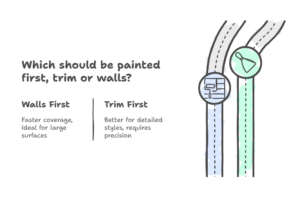
Painting Walls First:
- Pros:
- It’s faster because you can be a bit less precise, especially when using a sprayer or roller.
- Easier to tape off the trim afterward for clean lines.
- Less worry about overlapping onto the trim because it will be painted later.
- Cons:
- Requires more precision when doing the trim, especially if the wall color is dark and the trim is light.
- Might require multiple coats to cover wall paint that bleeds onto the trim.
Painting Trim First:
- Pros:
- Ensures sharp lines where trim meets walls if taped correctly.
- Any wall paint that overlaps onto the trim can be touched up easily.
- Cons:
- Takes longer since trim usually needs more detailed brushwork.
- You might need to do touch-ups if the wall paint bleeds over onto the finished trim.
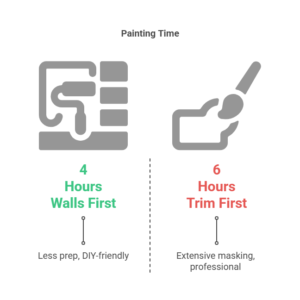
In most professional settings, walls are painted first, especially when using sprayers. This lets painters cover large areas quickly, and then they go in with precision on the trim. However, if you’re doing it by hand and want cleaner edges without a lot of taping, you might start with the trim.

Step-by-Step Guide to Exterior House Painting
A smooth, professional-looking paint job doesn’t just happen. Follow this step-by-step guide to avoid peeling, bubbling, and premature fading.
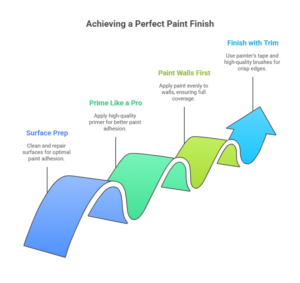
1. Surface Preparation:
Start by cleaning the entire exterior thoroughly. Use a pressure washer or scrub brush with a cleaning solution to remove dirt, mildew, and flaking paint. Let it dry completely.
Inspect for any damages—rotted wood, cracks, or holes—and fix them. Sand rough spots to ensure the new paint adheres properly. This stage is often overlooked but is arguably the most critical.
2. Priming:
Always use a good-quality exterior primer, especially if you’re painting over bare wood, patching areas, or making a drastic color change. Primer helps the paint stick better and last longer. Apply primer to both the trim and walls.
3. Painting Walls First (If Preferred):
Start with the largest area to cover—the walls. Use a roller or paint sprayer for even coverage. Cut in around windows, doors, and other trim areas with a brush to get clean edges. Allow the paint to dry fully before taping for trim.
4. Painting Trim:
Once the wall paint has dried completely, it’s time to tape it off and paint the trim. Use painter’s tape and press it firmly to avoid bleed-through. Use a high-quality angled brush to get into the corners and creases. Two coats are usually best for vibrant, long-lasting color.
Common Mistakes to Avoid
Even seasoned DIYers can make a few missteps. Avoid these common exterior painting mistakes:
- Painting in the wrong weather: Avoid painting in extreme temperatures or high humidity. Ideal conditions are dry weather with temperatures between 10°C to 25°C.
- Skipping cleaning and sanding: Paint won’t adhere well to dirty or glossy surfaces. Cleaning and light sanding can make all the difference in durability.
- Not taping off edges properly: Taping might seem tedious, but skipping it can lead to sloppy lines and more touch-up work later.
- Rushing the job: Allow each coat to dry fully before applying the next. This prevents smudging and uneven textures.
Time and Labor Considerations
How you approach the painting process—trim first or walls first—can significantly impact your timeline.
If you’re doing a DIY job, painting walls first can save time, especially if you’re using a roller or sprayer. Trimming later allows you to focus your attention on the details without the worry of messing up the large surfaces.
Painting trim first can slow you down, especially because trim usually involves brushwork and more attention to detail. But it may help avoid masking large areas later on.
If you’re hiring professionals like the team at experthousepainters.co.nz, they’ll likely use sprayers for efficiency and prefer painting the walls first. This is faster and requires less prep than starting with trim.
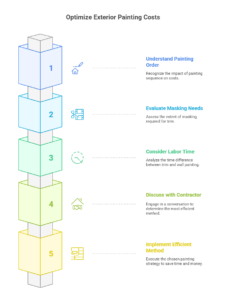
Cost Implications of Trim vs Wall First
You might not think the order would affect cost much—but it can.
- More Masking Needed? If you paint the trim first, you might need to do more taping and masking before spraying or rolling the walls, increasing prep time and materials.
- Labor Time Difference: Brushwork (usually needed for trim) is slower and more labor-intensive than rolling or spraying walls. Doing trim first could increase total labor time, especially for detailed homes.
For homeowners budgeting for a professional exterior paint job, it’s worth discussing the sequence with your contractor. Opting for the more efficient approach could save both time and money.
Conclusion
Painting the exterior of your house is more than just slapping on a fresh coat. The choice between painting trim or walls first might seem minor, but it can affect how clean, efficient, and successful your project turns out. While painting walls first tends to be the go-to for speed and practicality, certain styles or details might demand a trim-first approach. Either way, success lies in prep work, the right tools, and attention to detail. Whether you’re a hands-on DIYer or looking to hire pros, now you’re armed with the insights to make the right call.